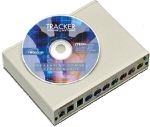
Tracker Wired (Legacy)
Objective outcome assessment via computerized range of motion testing. Protocols for cervical, thoracic, and lumbar spine as well as upper and lower extremity allow for complete documentation of injury or impairment. Patient’s test history can be graphically displayed to document treatment efficacy, justify continuation of treatment or identify maximum medical improvement.
Note: If you are using a USB adapter, follow the manufacturer’s instructions for installing the device. Then complete the following setup instructions.
Warning:Make sure the Tracker™ Interface Box is not connected to an electrical outlet while performing steps 1-5!
1. Connect the female end of the 9-pin serial cable to a serial COM port on your computer. If your computer’s serial COM port is a 25-pin jack, use the 25-pin female to 9-pin male converter included with your system.
2. On the back of the Tracker Interface Box, connect the male end of the serial cable to the port marked “Serial Com Port.” (See illustration.)
3. Connect the cables to your instruments. Tracker Inclinometers have RJ11, “telephone-type,” jacks on both ends of the cables.
4. Connect the instrument cables to the appropriate ports on the front of the Tracker Interface Box. Make sure the cable from the Inclinometer marked Primary is plugged into the Primary port on the Tracker Interface Box. The Secondary Inclinometer must be plugged into the Secondary port on the Tracker Interface Box.
5. Plug the Foot Switches into the back of the Tracker Interface Box.
Be sure the connections match the Foot Switch labels.
6. Plug the power supply into an outlet and connect it to the back of the Tracker Interface Box.
7. Turn on the Tracker Interface Box with the switch on the back of the box. The green light on the front of the box should come on.
Important Notice: Always turn the Tracker Interface Box off when plugging in or unplugging instruments.
Help Us Improve!
While perusing our support articles, if you find an article confusing or you feel it could be written better, just click add a comment and leave your concerns.
Our Customer Service department will attempt to address your concerns as soon as possible. Thank you for helping JTECH help you☺


 Very helpful
  Could be better
  Not helpful
Add a Comment