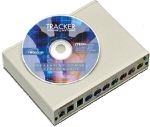
Tracker Wired (Legacy)
Objective outcome assessment via computerized range of motion testing. Protocols for cervical, thoracic, and lumbar spine as well as upper and lower extremity allow for complete documentation of injury or impairment. Patient’s test history can be graphically displayed to document treatment efficacy, justify continuation of treatment or identify maximum medical improvement.
 Very helpful
  Could be better
  Not helpful
 A full calibration is recommended for all JTECH force gauges on a yearly basis with certified weights. For more information, contact JTECH Customer Service.
1. Select Full Calibration from the system drop-down menu, and then select the instrument that is to be calibrated.
2. Wake up a wireless instrument by gently pressing the “On” button. For Legacy instrument calibration, make sure the Tracker Box is turned on.
Note: The value displayed in the upper right-hand corner of the Calibration screen is the raw value that will be captured when the calibration is performed. A Ø symbol indicates that communication with the instrument has not been established.
3. Make sure there is no weight or force applied to the instrument and click the "Zero" button to zero calibrate the device.
4. Enter the amount of weight for the calibration into the Weight field and select the “Units” (pounds, metric or newtons) from
the drop-down list. Normal ranges for weight calibrating the device are displayed in the screen’s right-hand column.
5. Apply the weight to the instrument and click the "Calibrate" button.
4. Compare the current calibration data with the previous calibration data and the factory calibration data. If the data varies more than 5%, contact JTECH Customer Service.
Add a Comment